Whole generator
One photo from the control-panel side and one from the alternator side.
 PNG Power SolutionsBackup power support
Rotor and stator matching guide
Two generators can have the same power but use different windings, shafts, bearings, frames and mounting parts. Send the information below so we can compare the old unit before quoting.
Why power alone is not enough
Manufacturers identify alternators by more than kW or kVA. Their documents also specify phase, voltage, frequency, winding, frame, bearing, adaptor and coupling. A correct replacement must agree with the original electrical design and mechanical connection.
First check - no dismantling
Many parts can be narrowed down before the alternator is opened. Keep every label readable and do not crop the edges of the machine.
One photo from the control-panel side and one from the alternator side.
Show brand, complete model, serial number, kW or kVA, voltage, frequency and phase.
Photograph any label or stamped number on the alternator body and end covers.
Show the output sockets, breaker, voltage selector and visible wire plugs. Do not disconnect wires for the photo.
Second check - measurements
Use a vernier caliper where possible. Write down the number and take a photo showing where the measurement starts and ends.
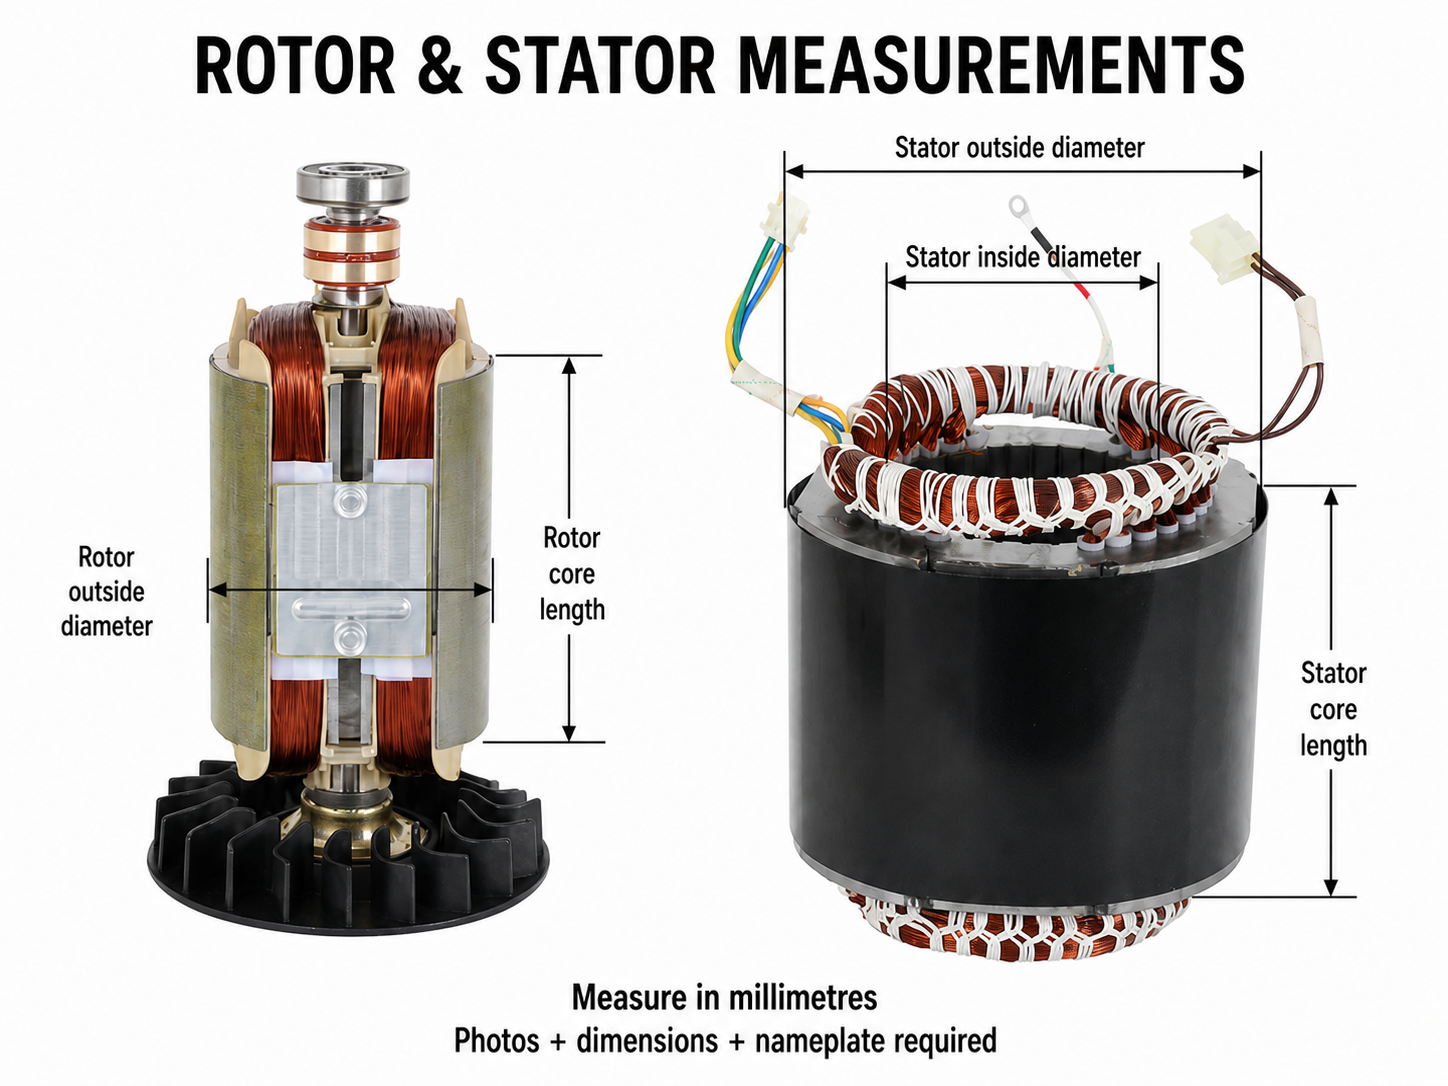
Measure across the widest outside edge of the stator body.
Measure the clear inside opening where the rotor runs.
Measure only the iron lamination stack, not the winding ends or casing.
Measure the rotor iron body across its diameter and along the lamination stack.
Record shaft diameter, bearing number or outside diameter, total rotor length, thread, keyway and any taper.
Show the front and rear brackets, locating register diameter, bolt-hole spacing and rotor-end style.
Final check
Keep all photos in one WhatsApp conversation. Include your town and province so stock and delivery can be checked at the same time.
Open the WhatsApp checklistAvoid a wrong order
Technical basis
The practical checklist above is based on official manufacturer documents that identify model and serial number for parts ordering and separately specify electrical and mechanical configuration.